Get Familiar with the Navigator
The Navigator is the master page you use to view a reservation and all its details. It launches from many areas of EMS Desktop Client.
To familiarize with the Navigator, this topic provides information on how to do the following:
- Open a reservation in the Navigator
- Review the Navigator's layout and folder structure
- Learn the commands available on the Navigator
Opening a Reservation in the Navigator
After you create a new reservation using the Reservation Wizard, the reservation opens automatically in the Navigator. To open an existing reservation, follow the steps below.
- On the toolbar, click the Navigator icon.
The Open Navigator dialog opens.
- On the Open field, select the item that you are opening—reservation, booking, or service order.
- Do one of the following:
- In the Reservation No. field, enter the reservation ID, service order number, or booking ID, and then click OK.
- To see the last reservation, booking, or service order that you made during your current or last EMS session, double-click in the field, and then click OK.
If you do not know the reservation number, you can search for the reservation. On the Open Navigator dialog, click Browse to open the Browser, and then find your reservation.
Open a Reservation from The Reservation Book
On the toolbar, click the Book icon to open the Reservation Book, and then in the Reservation Book, double-click a reservation; this opens the reservation in the Navigator.
Open a Reservation Through a Group
You can search for a reservation made for a group or individual user from the Groups icon; this opens the reservation in the Navigator.
Open a Reservation Using a Search
You can search for a reservation using the Browser, the Web Reservation Tool, and/or the Calendar. Double-clicking the search result entry will open the reservation in the Navigator. You can also click Browse on the Open Navigator dialog to open the Browser search tool.
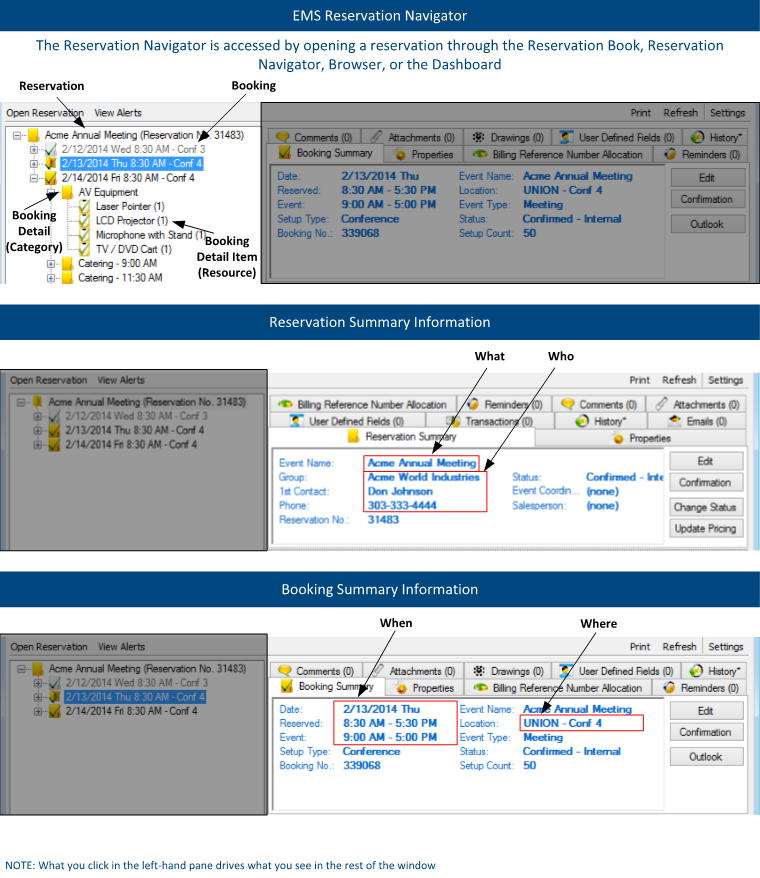
Layout and Folder Structure
The Navigator has three panes:
- The left pane displays a selected reservation, all the bookings for the reservation, and the details for each booking in a hierarchical folder structure. The top-level folder is the reservation folder. The folders that are located beneath a reservation folder are the booking folders. The folders that are located beneath a booking folder are the booking detail folders.
- The top right pane of the Navigator displays different tabs and options depending on the folder or item that you click on in the left pane.
- The bottom right pane of the Navigator functions just like a browser window, and shows different information and options depending on the folder or item you click on in the left pane.
Reservation Folder
A reservation folder contains the who and the what information for the reservation. When you select a reservation folder in the left pane of the Navigator, the reservation number is displayed in the title bar of the Navigator. You can change the width of the data columns, you can sort the data columns on a tab in either ascending or descending sort order, and you can rearrange the column order by dragging a column to a new location using the column heading. When you select a reservation folder, the bookings for the selected reservation show in the Bookings pane (the lower right pane) of the Navigator. The colored rectangle to the left of a booking indicates the booking's status. If a booking has been canceled, a Canceled icon is displayed on the booking folder in both the Reservation (left) pane and the Bookings pane. You can right-click in the upper pane and open a context menu with options for emailing the group for which the reservation was made, or the first contact for the group.
When you select a Reservation folder, the following tabs are displayed in the upper right pane of the Navigator:
- Reservation Summary Tab
- Properties Tab
- Billing Reference/PO Allocation Tab
- Reminders Tab
- Attachments Tab
- Comments Tab
- User Defined Fields Tab
- Transactions Tab
- Emails Tab
Reservation Summary Tab
The Reservation Summary displays information about the selected reservation, including the event name, the group for which the reservation was made, the group contact name, the group contact phone number, and the reservation number.
Properties Tab
The Properties tab displays not only the same information as the Reservation Summary tab, but also information such as the event type, the second group contact, the date that the reservation was added, the date that the reservation was changed, and so on.
Billing Reference/PO Allocation Tab
By default, the charge for a booking is allocated to a single billing reference number and/or a single purchase order (PO) number. This tab enables you to allocate booking charges or booking detail charges to multiple billing reference numbers and/or PO numbers. Your EMS administrator must enable the "Use Billing Reference Allocation" and "Use PO Number Allocation" parameters for this tab to be displayed.
See Also: Allocating Multiple Billing and PO Numbers For a Reservation.
Reminders Tab
The Reminders tab displays any reminders that were created for the selected reservation.
Attachments Tab
The Attachments tab displays any attachments that were saved with the reservation.
Comments Tab
The Comments tab displays any comments that were made for the selected reservation.
History Tab
The History tab displays a list of changes made for the selected booking: the date the change was made to the booking, the user who made the change to the booking, and information (field) that was changed for the booking.
User Defined Fields Tab
The User Defined Fields tab displays the additional fields that store custom data for a reservation. Your EMS administrator configures the types of fields that are available as well as the allowed values for these fields. See Also: Working with User Defined Fields.
Transactions Tab
The Transactions tab displays any invoices that were generated for the selected reservation or any payments that were applied to the selected reservation.
Emails Tab
The Emails tab summarizes any emails that were sent via SMTP to the group for whom the reservation was made. This does not include notifications and other communications done using EMS for Outlook or by other means.
Booking Folder
Booking folders contain the where and when information for the reservation. If you can expand a booking folder, this indicates that details have been added to the booking. The booking details for the selected booking are displayed in the Booking Details pane (the lower right pane) of the Navigator. A green background for a booking detail folder indicates that one or more booking detail items have been invoiced for the booking.
When you select a booking folder in the left pane of the Navigator, the booking number is displayed in the title bar of the Navigator. You can change the width of the data columns, you can sort the data columns on a tab in either ascending or descending sort order, and you can rearrange the column order by dragging a column to a new location using the column heading.
When you select a Booking folder, the following tabs are displayed in the upper right pane of the Navigator:
- Booking Summary Tab
- Properties Tab
- Billing Reference/PO Allocation Tab
- Reminders Tab
- Attachments Tab
- Comments Tab
- Drawings Tab
- History Tab
Booking Summary Tab
The Booking Summary displays information about the selected booking, including the event date, the reserved time, the event time, and so on. If you use Outlook as your email program, you can use this tab to add the selected booking to your personal calendar (click Outlook > Add to Personal Calendar) or send invitations for the meeting to one or more contacts in your Outlook Address Book (click Outlook > Send Invitation).
Properties Tab
The Properties tab displays not only the same information as the Booking Summary tab, but also information such as the event type, the setup count, the date that the booking was added, the date that the booking was changed, and so on.
Billing Reference/PO Allocation Tab
By default, the charge for a booking is allocated to a single billing reference number and/or a single purchase order (PO) number. This tab enables you to allocate booking charges or booking detail charges to multiple billing reference numbers and/or PO numbers. Your EMS administrator must enable the "Use Billing Reference Allocation" and "Use PO Number Allocation" parameters for this tab to be displayed.
See Also: Allocating Multiple Billing and PO Numbers For a Reservation.
Reminders Tab
The Reminders tab displays any reminders that were created for the selected booking.
Attachments Tab
The Attachments tab displays any attachments that were saved with the booking.
Comments Tab
The Comments tab displays any comments that were made for the selected booking.
Drawings Tab
The Drawings tab displays a list of files that were attached to the selected booking.
History Tab
The History tab displays a list of changes made for the selected booking—the date the change was made to the booking, the user who made the change to the booking, and information (field) that was changed for the booking.
Booking Detail Folder
If you can expand a booking folder, this indicates that details have been added to the booking. Booking details, which are also called categories, are the services (catering, A/V equipment, and so on), notes, attendees, activities, and room charges that you can add to a booking.
See Also: Adding Services to a Meeting
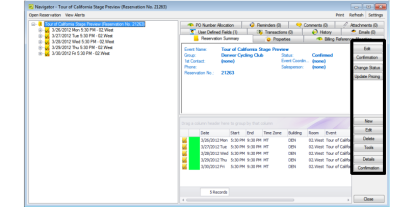
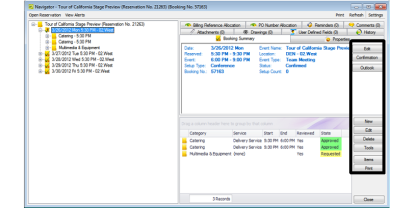
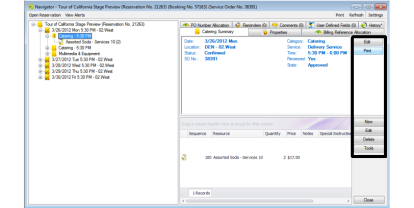
Navigator Commands
The Navigator has two constant commands in the upper left corner: Open Reservation and View Alerts. The Navigator also has three constant commands in the upper right corner: Print, Refresh, and Settings.
|
Command |
Description |
|---|---|
|
Open Reservation |
Allows you to open and work with multiple reservations in the same Navigator session. |
|
View Alerts |
Open and view any alerts that have been generated for the selected reservation, booking, or a booking detail that is a service order or catering category. |
|
|
|
|
Refresh |
For refreshing the Navigator display based on the settings that you have specified in the Navigator Options dialog. |
|
Settings |
|
All other navigator commands are available as buttons in the upper right pane and lower right pane of the Navigator.
Navigator Options
The Navigator Options (click in the upper right corner) has three tabs:
General Tab
On the General tab, you select the options for such things as which types of bookings to show in the Navigator (old bookings and/or canceled bookings), the result of double-clicking a listed folder (opens the item or expands the folder), the booking time that is displayed (reserved time or event time), and the highlight color for invoiced items.
|
Field |
Description |
|---|---|
|
General |
|
|
Show Old Bookings |
Show bookings in the Navigator that occurred before the current day's date. |
|
Show Canceled Bookings |
Selected, show bookings in the Navigator with a canceled status. |
|
Show Wizards in Tools menu |
Show all on the Tools menu in the Bookings pane. If cleared, show only the Wizards option, which you must click to open a form from which you can select a tool. |
|
Show Deleted Items |
Show all deleted items (bookings, deleted resource items, and so on) for a reservation in the Navigator. |
|
Hide Empty Tabs |
Hide the tabs that do not have any data displayed on them for a selected reservation, booking, or booking detail. |
|
Double-Clicking a Listed Folder |
|
|
Opens the item |
Opens the item for editing. |
|
Expands folder |
Opens the next level of folders. |
|
Wizard Results |
|
|
Always Show |
Show a confirmation of all changes, regardless if they were successful, on a Wizard Results page. |
|
Show Unchanged Only |
Show only those changes that were not successful on a Wizard Results page. |
|
Confirmation |
|
|
Always prompt |
When you click Confirmation, opens a Confirmation filter which you can use to change the default filter options for a confirmation before generating it. |
|
Print Preview |
When you click Confirmation, opens an onscreen preview of the confirmation. |
|
|
When you click Confirmation, opens an email of the confirmation. |
|
|
When you click Confirmation, prints an immediate confirmation. |
|
Booking Display Time |
|
|
Reserved Time |
Show the total time for which the space is reserved. This time is the event time plus the setup/teardown times. |
|
Event Time |
Show only the event time for which the space is reserved. |
|
Invoiced Items |
|
|
Highlight Color |
The color with which invoiced items are highlighted in the Navigator window. |
|
Service Orders |
|
|
Show Pricing |
Show pricing on a service order. |
|
Show Item Notes |
Show item notes on a service order. |
|
Show Item Special Instructions |
Show special instructions for items on a service order. |
|
Highlight Changes Made Within (days) |
Highlight any changes that have been made to a service order within the specified number of days. |
|
Footer Message |
Show reconfigured blocks of text that appear in footer of a service order (for example, a Cancellation policy). |
|
Booking Edit |
|
|
Auto Adjust Reserved Time When Event Time is Changed |
If the reservation includes setup and/or teardown times, then automatically adjust the total time for the reservation (the event time plus the setup/teardown time) when the event time is changed. |
At a Glance Tab
On the At a Glance tab, you specify whether reminders, comments, attachments, and so on are to be displayed in the left pane of the Navigator when a reservation folder, booking folder, booking detail folder, and/or booking detail item is opened.
Highlight Categories
On the Highlight Categories tab, you indicate whether a checkmark is to be displayed on all booking detail item folders for the selected booking detail. The default is to Highlight All, which means every booking detail item folder for every booking detail is denoted with a checkmark.
Other Navigator Commands
All other Navigator commands are available as buttons in the upper right pane and lower right pane of the Navigator. The buttons that are available are dynamically updated based not only on the folder or item that is currently selected in the left pane of the Navigator, but also on the tab that is open in the upper right pane of the Navigator.
Buttons available in the Navigator window with a reservation folder selected
Buttons available in the Navigator window with a booking folder selected
Buttons available in the Navigator window with a booking detail folder selected
Many of these same commands are also available on a context menu, which is a menu that opens when you right-click on a folder or item in the Navigator. All the context menus that are available in the Navigator offer a limited set of choices based on the folder or item that is selected in the Navigator.
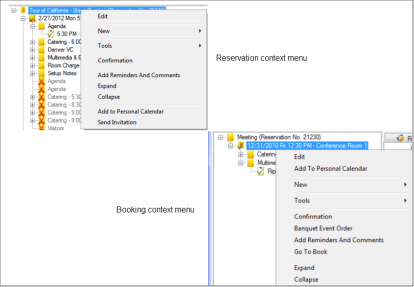
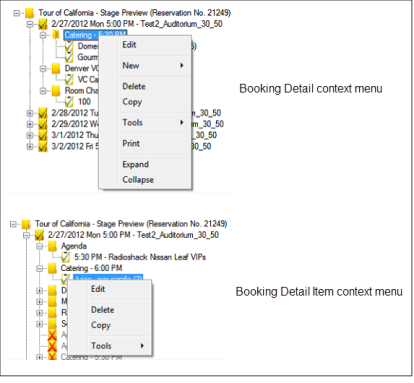
Comparing context menus