Use Application Pool Identity for Integration for Exchange Service Account
Credentials can be maintained at the Application Pool level instead of entering the Integration for Exchange account credentials on the PAMConfig.aspx page (as in V44 and previous releases). This allows your organization to maintain absolute control—only IIS applications running in the newly created application pool can run as the Integration to Exchange Account.
This functionality requires the following:
- Microsoft Exchange 2007 (SP1) or Exchange 2010.
- Microsoft Exchange Impersonation Account (your EMS Integration to Exchange account). This account must be using Exchange Web Services (EWS) Impersonation, not full access to the mailbox store.
Configure the Application Pool
- Open IIS Manager.
- Open the Application Pools pane.
-
Click Add Application Pool…
The Add Application Pool window opens.
- Enter a unique name and ensure the correct .NET Framework is selected. Managed pipeline mode should be Integrated. Click OK
- Find the Application Pool you just created. Right-click it and select Advanced Settings.
- The third section in the list is Process Model. Highlight Identity and then click the (...) button to configure.
- Choose Custom Account and then click Set. Enter the username and password for your EMS Integration to Exchange account. Confirm the password and click OK on any remaining dialogs.
- Within IIS Manager, navigate to the Virtual Directory containing the Integration for Exchange Web Service. This is under the Default website by default, but can be installed to a different website.
- With the IntegrationExchangeWebService Virtual Directory highlighted in the left pane, select Basic Settings… under Actions in the right pane.
- Click Select and then choose your newly created application pool from the list.
- Click OK on all remaining dialogs.
Configure Integration for Exchange to Use the Application Pool Account
- Navigate to the Integration for Exchange configuration area by opening a browser and entering the following:
http://[ServerName]/PAMWebService/PAMConfig.aspx (replace [ServerName] with the name of your web server)
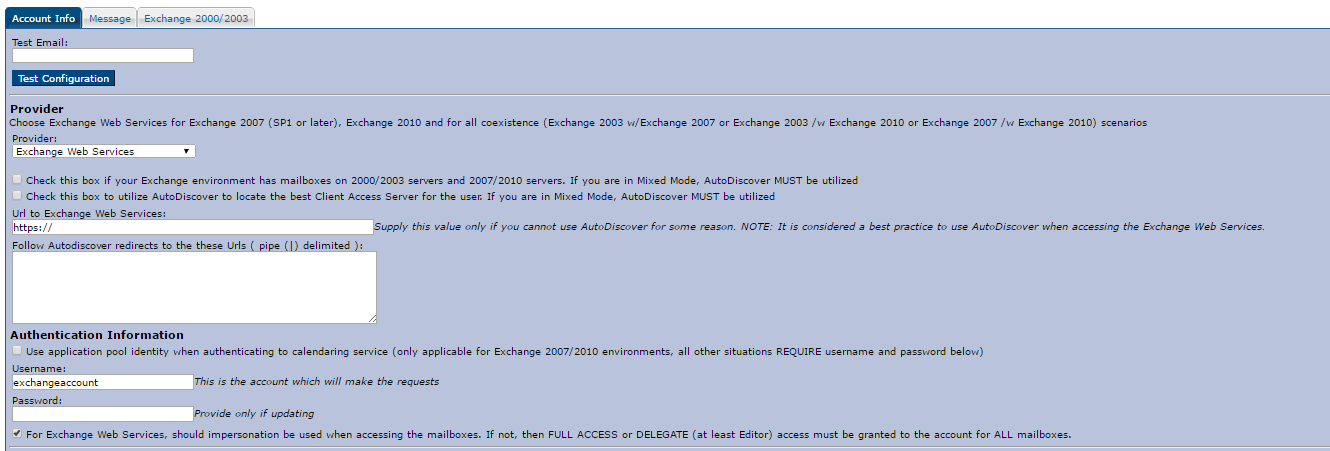
- From the Account Info tab, find the Authentication Information section, check the box for Use application pool identity when authenticating to calendaring service (see following image).
- With this option enabled, you can leave the Username and Password fields blank in the Authentication Information section.
- Click Save at the bottom of the page.