Import a List of Visitors to a Meeting
To import a list of visitors to a meeting:
- Ensure your list of visitors is ready for import.
- Navigate to the meeting you want to work with.
- Import your list of visitors.
- Select the meetings within the reservation to which to add your list of visitors.
- Confirm and finalize.
To utilize the Advanced Visitor Management Module, you must purchase an additional license. Without this optional module, users must add visitors manually and the “Import” and “Print Format” buttons will not be available.
-
Your list of visitors must be a tab-delimited spreadsheet that contains the information (in the order listed) for the visitors you want to import. Each visitor must be a separate line entry.
Field
Description
Required/Optional
Visitor
True/False
Company Name
Text. 50 characters maximum.
Optional
Email Address
Text. 255 characters maximum.
Optional
Phone
Text. 50 characters maximum.
Optional
Notes
Text. No maximum.
Optional
Name
Text. 50 characters maximum.
Required
You can click Print Format on the second page of the Add Booking Details Wizard (described below) to see the required format for the tab-delimited file.
-
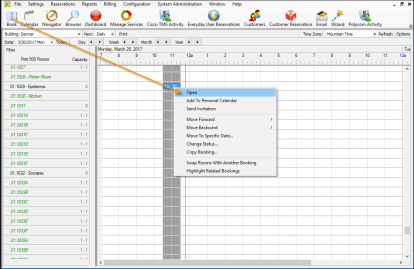
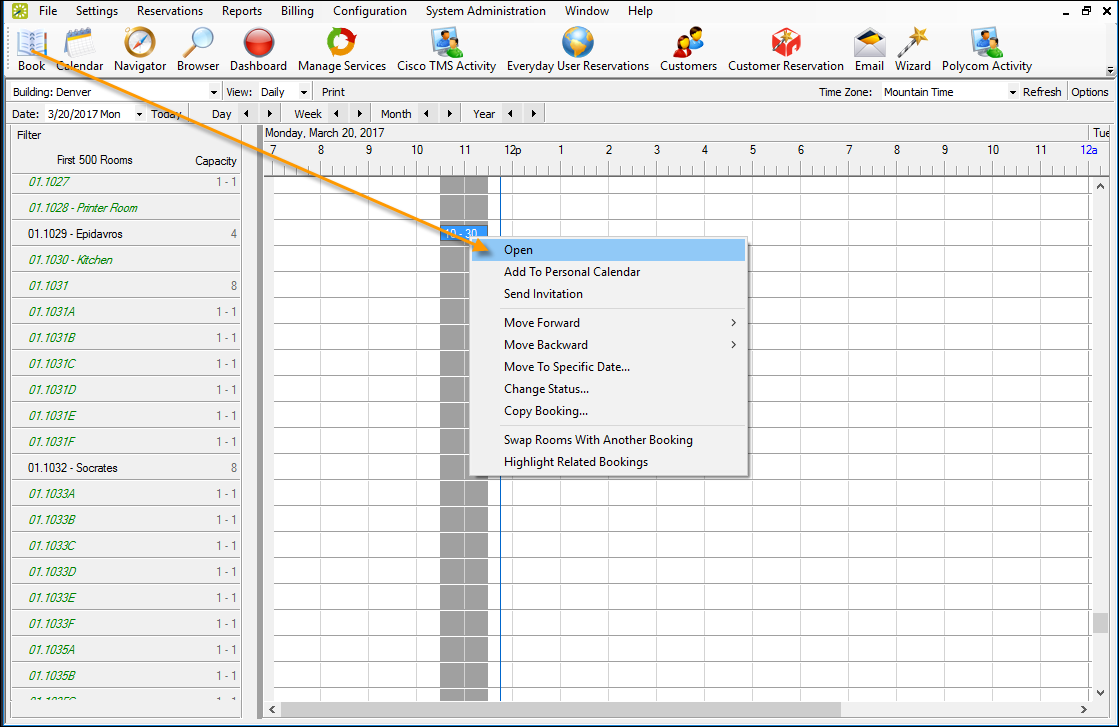
Open the reservation from the Reservation Book.
-
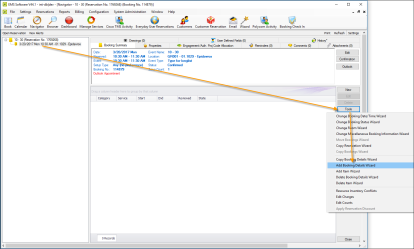
In the left pane of the Navigator window that opens, select the meeting for which you are importing the list of attendees/visitors, and in the Bookings pane on the right, click Tools, and then select Add Booking Details Wizard.
-
The Add Booking Details wizard opens.
-
Select Visitors or Attendees, and then click Next.
-
The second page of the Add Booking Details Wizard opens with a blank row for adding an attendee/visitor to the event.
-
Click Import. The Open File dialog opens. Browse to and select your visitor list spreadsheet, and then click Import to import the file. The Add Booking Details Wizard is updated with the imported attendee/visitor information. Each imported visitor is a separate line entry in the Wizard.
-
Click Next. The Select Bookings window opens, listing all the bookings within the selected reservation with a date on or after the current day's date, and that do not already have the visitor list added.
To show canceled bookings, clear the Hide Canceled Bookings checkbox. To hide them, select the option. To show all bookings regardless of date, clear the Hide Old Bookings option.
-
Select the meetings to which to add your visitor list (use Ctrl+click or Select All to select multiple meetings), and then click Finish.
A message opens asking you if you want to add more booking details.
-
Click No.
A message opens indicating that the changes were made successfully.
-
Click OK.
The booking detail (Visitors) and its items (visitors) are displayed as folders under the appropriate booking folders in the Navigator.